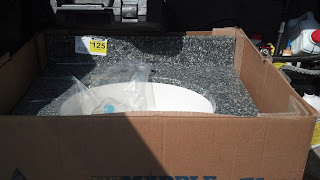
Wednesday, August 28, 2013

Even my vacations involve doing work!

Problem: Bilco Ultra Series polymer basement bulkhead doors are NOT the same size as their metal counterparts (despite strenuous advertisement that they are a direct replacement)

Half-cocked solution: Install bulkhead over existing slab, seal in place where possible, and fit patio bricks under the overhanging 6" ...

Not good.

Correct plan: New concrete!

I decided I wanted to do this correctly, which meant installing anchor bolts to link old and new, and cutting down the old slab cap so that there would be no seam for water to penetrate.

Diamond masonry wheel for my angle grinder, I love you.

 Regrettably, I forgot one of the most basic rules of drilling holes: ALWAYS buy 2 of every bit... that one came back and bit me. Oh well.

I got the holes drilled, trimmed the cap and set the bolts. Cutting the cap like this, and then breaking off the cut sections with a hammer, also leaves a nice coarse surface for the new concrete to bond to.
 
Then, I got the form cut and in place using some 5/8" plywood scrap I had laying around. There was no real need for reinforcements, since the form was 90% buried in the sand anyway.
Next step: Pour some concrete! I chose to use a ready mix concrete pre-package for ease of mixing, and better strength (since I was not using rebar) over straight cement. And because I had to haul the materials on a 3 hour drive in my car, which is no good for loose aggregate.

I figured I would need 150lbs, so I bought 200lbs and got precisely this far:
 Figures.

So off to the hardware store during that critical window before my first batch kicks, and after adding another 160lbs of concrete mix, here we are:
I was lazy and used the tuck-pointing trowel I already had to semi neaten things up, rather than buying the correct tool for this.

And here's where I left the project:
Next time around, I will dress up the concrete surface a bit using a coarse sanding wheel / masonry grinding disk, for aesthetic purposes. Then, since the cement has had a few weeks to cure, I can seal the polymer bulkhead panels in place, and then make sure the aluminum cross-tie/sill fits in place and install the concrete anchors for that, then seal it in place as well.

One more project down that I needed to do before winter. Many more to come.

Sunday, August 18, 2013

Today was a half-and-half day. First off, I took my trucks down to the local Antique Truck Club of America show. Good stuff.
 From the show, highlights:
'67 C10 shortbed. Much want.
 This thing is a Franken-truck of sorts, but still totally cool
 1946 Hudson pick-up. The most cool factory built truck, ever.
So that about sums that up. Back to our regularly scheduled non-sense.

When I got home, first order of business was adding rear leg-jacks to my car hauler. The factory offered it like this but I didn't have time to wait for an custom order so here I am.

Mount point cleaned up


Pivot tube welded in place
And the end result


Of course, x2. Did it on both sides. Excellent idea, now I can load the trailer without worrying about what the tongue will hit if/when it tips up.

And then on to the tractor. First, gusseting the receiver tube to reduce the flexy bucket problem
At this point, the receiver is well enough attached that the only flexure I see in the bucket is occurring about half way down the back face - to make it any stiffer I would have to box the entire upper section.


And then, I went just a tad bit crazy with the J-hooks
But it will be highly useful. Yes, those are 1/4" steel doubler plates under the hooks. I don't mess around.

I suppose I should note (for anyone who hasn't figure it out yet) I like to talk in pictorial format.

Final thought. Paint anything John Deere green and it looks ten times more awesome


Saturday, August 17, 2013

More projecting for me. Chan is seriously falling behind.

 First up, finished off my frame spacer blocks.

 Which were sorely needed.

I had previously decided that the bumper-less factory look of this truck just wasn't doing it for me, plus the license plate kept getting bent when I lifted the bed... so I decided to make a bumper


 Part of this process involved doing this:
It's always the brand new, sharp drill bits that you break. Figures. Now my drill index is one 3/8" short.

The other thing that this involved was unlooming the rear light harness and re-routing the tail lights and reverse lights so that they didn't go up into the rear deck.

This was NOT the best idea to start as it was getting dark. Duh. And then I ran out of electrical tape, so I had to stop making changes. I still need to shorten the bumper portion of the harness.

End result looks something like this:

Not too bad, I'd say.

Tomorrow, I'm headed to the local truck show with both of my rigs. Role reversal!


Thursday, August 15, 2013

Today is an actual project day!

So my 1972 1 ton flatbed GMC is nicknamed Big Red. Big Red started out life as a factory platform stakebody. Since I like playing at being Dr. Frankenstein, it's recently been merged with a '67 Chevy dumptruck, which I posted some pictures of before.

Today's task: Start manufacturing wooden spacer blocks to support the dump body frame. GM originally used wood to carry the platform bed.

Really, GM? Wood??

Anyways, here's the result.

 
Also, since Red was the first year for windshield mounted (read: glued on) rearview mirrors, it had predictably fallen off. Today, I replaced it with a good old fashioned roof mount. Much better.

Unfortunately for me, such a part order usually comes with one of these:
So I should probably be hiding my wallet.

Next up on my list, on a completely different subject, is loosing my sanity:
That is, in fact, the bucket of my just over 1 year old John Deere tractor... and a jigsaw.

You know. Because that's what normal people do. Though a lot of people would argue I lost my sanity with this particular toy when I added a sweet exhaust stack.

But I digress.

I was busy adding this pretty sweet receiver hitch. Now I can move trailers around without having to take the backhoe off and install a 3 point attachment Every. Single. Time.


Of course, I had to make it the right color
And then, after painting, I discovered a need for reinforcement in the top of the bucket. My flatbed trailer is a tad tongue heavy. Oh well, project for another day.

Also. Stanley tape measures will burn. I was surprised to learn this today. They actually burn quite well.
Oops.


Wednesday, August 14, 2013

1. Possibly having rabies is nowhere near as alluring or awesome as it may sound. The number of needles involved is not awesome AT ALL

2. Tonight is a pretty normal night:
Chan: So I want to buy this for my Tahoe:


JJ: Then remove the LCD and install it in your overhead console where the non-functional DIC is?
Chan: Well, no. Technically the DIC works. I like that it has temperature and compass. I was thinking in the dashboard.
JJ: Why do that? There was an option in the 1999-2000 GMT400 line for a compass and temperature display mirror, couldn't you install that? It came on "Luxury" package trucks
Chan: So you mean super hard to find?
JJ: No no, LT trucks too. RPO code DF5
Chan: Oh, that... give me one second to go find something
Chan: You mean this one?
 JJ: Yep, that's the one.

I didn't find this in any way unusual at all. Figures.

Monday, August 12, 2013

So true James, there are many stories of misadventures to be told and many to come no doubt. Speaking of which I still think my truck fit perfectly fine in your garage, I don't know what you were talking about.

Ahh yest there's a story behind that one, but I'll save it for another day. There is one thing I might add, and that's you may see some non vehicular related posts around here from time to time. You see both me and JJ have somehow managed to convinced reputable financial institutions to give us large sums of cash, of which we lacked, in order to purchase property. What they were thinking we still don't know and for the record we live in  two separate parts of the country. Anyways, while JJ has had his place for several years now, I just recently, oh so recently, as in the don't try and walk through the living room at night without the lights on due to the maze of boxes type of recently, moved into my new house. Why I was delusional and decided to do this during the middle of the hottest part of the summer, err I cant tell you. While that picture of a 02 GMC Sierra with a trailer may looks nice on this blog, what you don't see is that I am soaked through after only 30 minutes, why did I think living on a 3rd story apartment was a good idea. 
And then things like this happened... that is a ditch, with one truck good and stuck in it. Note to self don't pull over that much to let a tractor pass in the future.


Rather than unpacking I have started doing things like this:

And now Lowe's and Home Depot have moved from the category of stores where I can easily spend money to causing General Quarters be set by my wallet. Oh but it such a great deal and it looks so much better than whats there right now.


Therefore I am somewhat ... kinda ... sorta...broke right now and despite there are many I want to do to said trucks I kinda need money for parts and for some reason NAPA and the GM Dealership don't like giving them away for free, so for at least the next few weeks there will probably be more pictures of drywall than fender wells from me. Thanks for joining us for the ride.
- Chanman
So this blog came about because of a running joke between Chanman and myself, since it seems like one of the two of us is forever doing something ridiculous which revolves around the same couple of broken GM trucks.

I will explain with pictures:

Pictures like these are a disturbingly regular occurrence around my house. So are ones like this:


Just to give you an idea.

My specialty is 67-72 classic GM trucks. Chanman, he likes diesels. Stay tuned to see what kind of misadventures are to come. I can assure you there's quite a lot of them.